How to upload file via Swagger in ASP.NET Core Web API?
Let us first understand a little bit about Swagger.
Swagger :-
Swagger is a Document which are generated by an open source project Swashbucle.AspNetCore for Web APIs that are built in asp.net core MVC. It is a machine readable representation of a RESTful API which enables support interactive documentation, client SDK generation and discoverability. In simple words it is a simple, clean but powerful representation of RESTful APIs.
Before uploading file via Swagger let us look at how to add Swagger in asp.net core Web API first.
First of all, create .Net Core API project.
- Open Visual Studio >> New project
- Under Visual C# Tab >> .Net Core
- Choose .Net Core Web Application and provide a name for your project.
- And Tab OK.
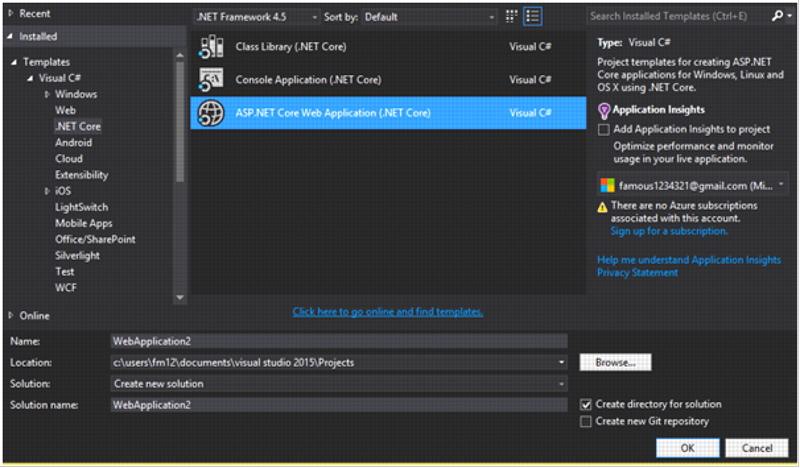
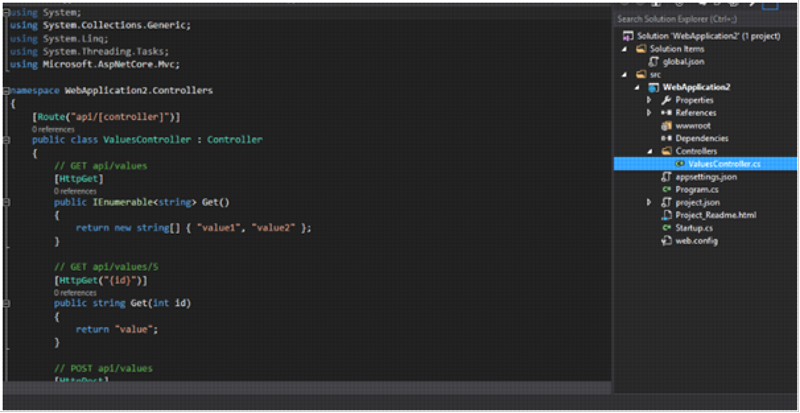
Now Choose Web API Template from new window and keep all other in default and click on OK.The default Web API Template comes with the Controller named Values with Get, Post, Put and Delete Methods.
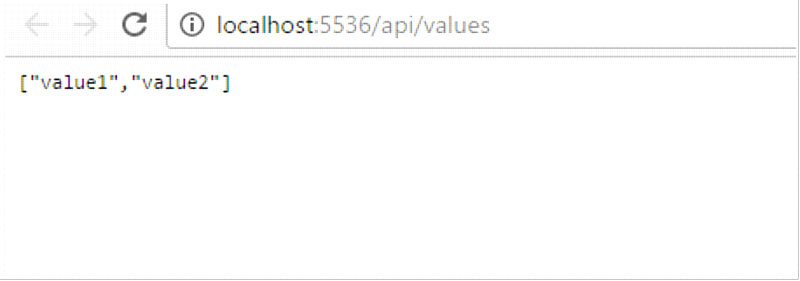
Once the WEB API project is created, just run the app. You will see the following. There is no UI. There isn’t a list of all API methods and any other detail about them.
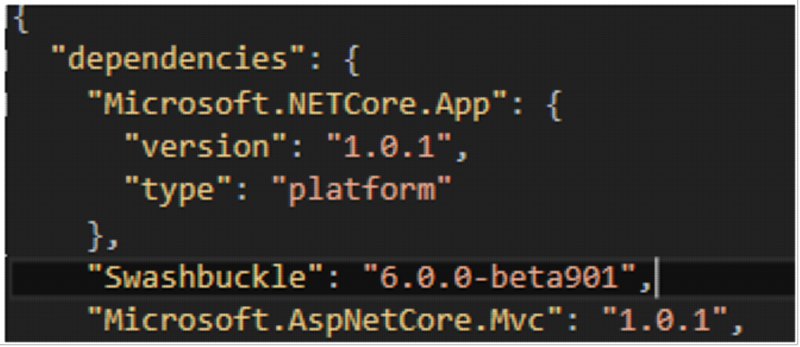
Here is the where swagger helps us out. To Configure Swagger first of all we have to install the nugget package for it. To do that there are many ways but this one is the easiest one.
- Open project.json file
- Write
"Swashbuckle": "6.0.0-beta901" under dependencies like this.
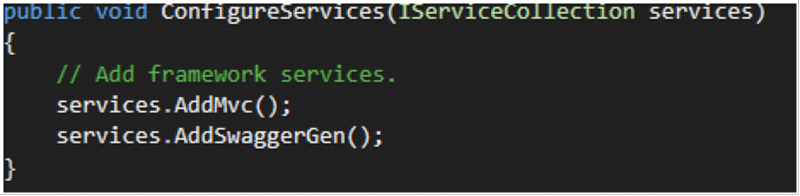
Now open Startup.cs file to add swagger service to middleware. And add the codes in configure Service Method as shown in the figure.
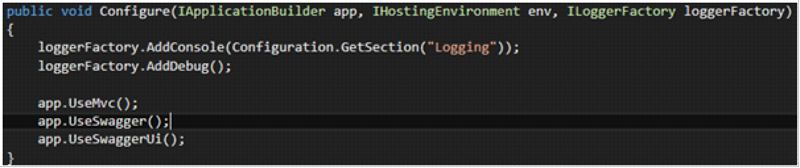
And In Configure Method like this:
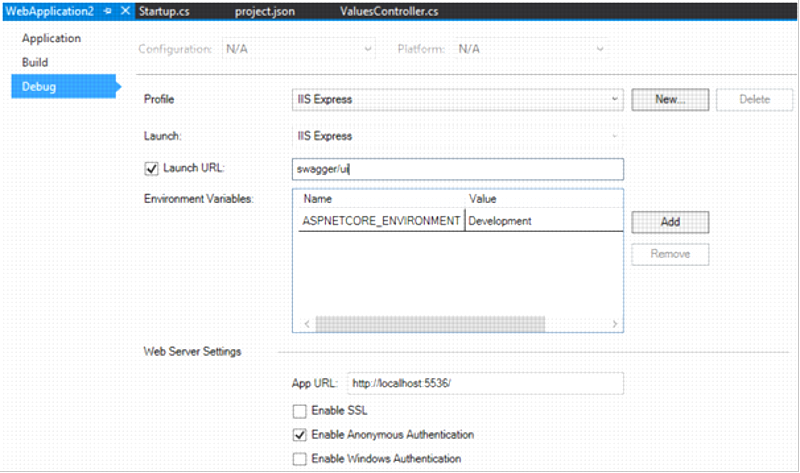
Now run the application IIS button but still now swagger UI is generated. To see the UI we have configure our URL our project. To do that we need to go to properties of our project.
- Right click on project name in the Solution Explorer. New window will appear.
- Go to DEBUG Tab and Edit the Launch URL to swagger/ui as shown below:
Now again start the project and you will see the output :
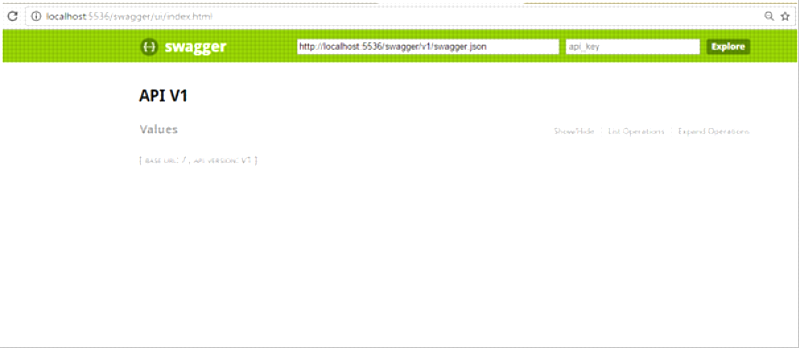
Click on Values to see the values.
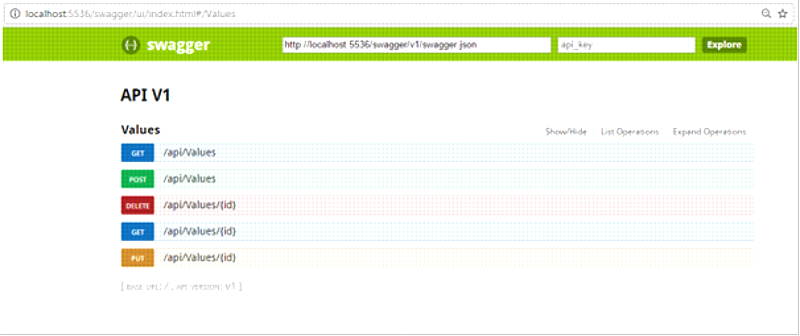
HTTP verb settings and along that API methods of Values Controller are shown in the Swagger UI. To Identify the actions easily different colours are used. Click on any of the methods given will give you details about accepted parameters and return type which allows us to test the method.
Now Let us head into uploading a file in asp.net core using Swagger.
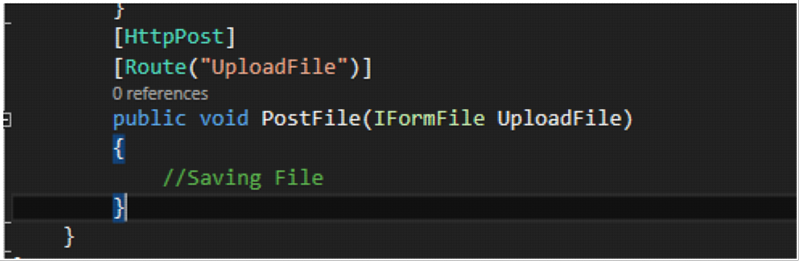
- Go to the Values Controller and provide the action to upload the file as shown in figure.
- Use the Namespace Microsoft.AspNetCore.Http
Now run the application you will see the method you have just added. Navigate to upload method and you will see the screen as following:
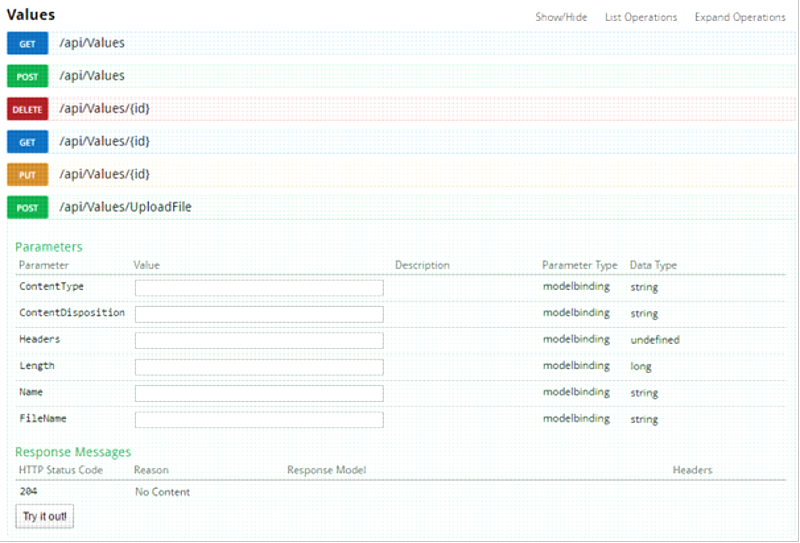
Here you see the multiple input boxes which are the properties of IFormFile which represents the uploaded file. But you cant’t upload file with these input boxes but it will make file upload control easy. Now Instead of these input boxes lets get the file upload control
Swashbuckle has IOperationFilter which allows to post-modify operation descriptions once they’ve been generated by wiring up one or more Operation filters. Implementing this filter will provide the option to modify or replace the operation parameters. To implement IOperationFilter, let’s add a class FileUploadOperation which implement this filter. IOperationFilter has only one method called Apply to implement.
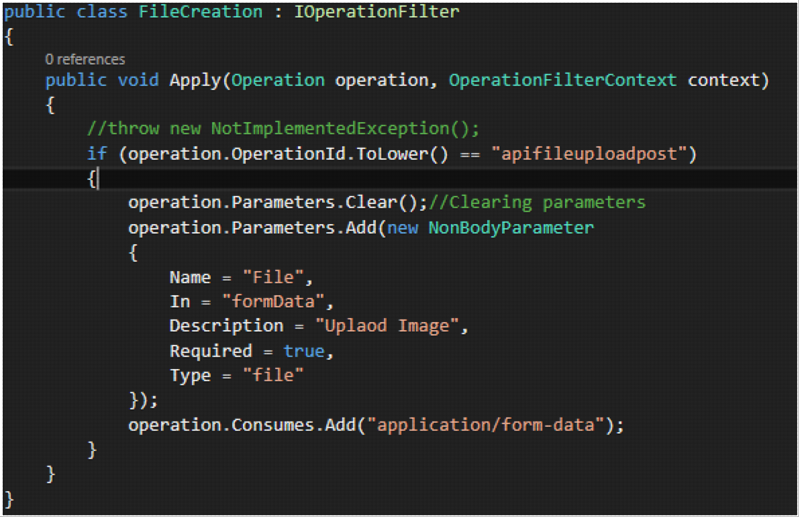
This filter will replace the multiple input boxes with file upload control. The above code does following things.
- It first checks for operation with OperationId as “apivaluesuploadpost“. The operationId name is a combination of couple of parameters. It is made up of “api” + [Controller name] + [Method Name] + [HTTP Verb].
Or in other words, it is the URL of your controller method, but without “/” + [HTTP Verb]. - It clears all the parameters. So all the properties of IFromFile interface are cleared.
- And then adds custom parameters to the operation. Please note, the Name parameter value must be equal to parameter name to the method. So in this case, it is “uploadedFile” PostFile(IFormFile uploadedFile). In property must be set to “formData” and Type must be “file”.
- Finally, consume type multipart/form-data which is required for file transfer from client to server.
And final step is to register this operation filter in Startup.cs.