File Provider in Asp.Net Core
Introduction:
In Asp.Net Core, the file system can be accessed through the use of File Providers. Simply it’s an abstraction over file system. The File Providers use IFileProvider interface and it has methods to get file information, directory information and also the setup change notification. The IChangeToken interface propagates notifications that a change has occurred. There are three types of IFileProvider Implementations and they are:
- Physical File Provider – This File Provider is used to access the actual or physical file of the system.
- Embedded File Provider – This File Provider is used to access files that are embedded in assemblies.
- Composite File Provider – This File Provider is used to provide combine access to the files from one or more providers.
Now lets create a Console Application in visual Studio to demonstrate it.
- Open Visual Studio 2015 Update 3.
- File >> New Project.
- .Net core >> Select Asp.Net Core Web Application
- Provide a suitable name for the project
- Click OK.
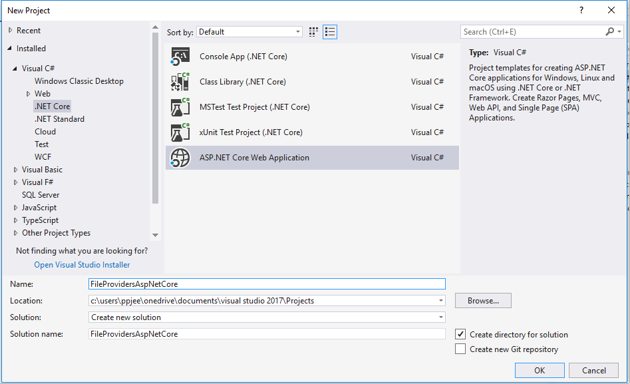
Now choose the template i.e web Application.
1.PhysicalFileProvider
The PhysicalFileProvider wraps the System.IO. File type and provides the access to the physical file system. It is able to access all the paths to a directory and sub-directory. It has limited access to some of the directory. We can instantiate a PhysicalFileProvider provider from the ConfigureServices service method of startup class and we can inject it as a dependency in controller constructor.
Now we will create a PhysicalFileProvider object and inject as dependency in our project. To do so open the Startup.cs file from Solution Explorer and write the code as shown in the code snippet below:

We need to use namespace here. One is Microsoft.Extensions.FileProviders and System.IO.
![]()
Now Lets add some code in HomeController as shown in the code snippet below to get the contents of FileProvider.
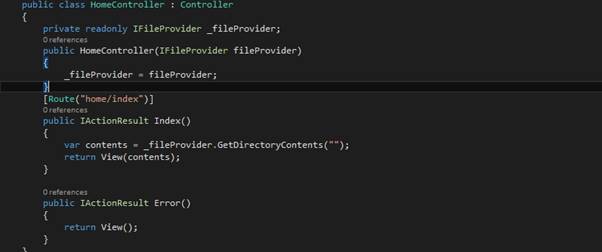
Here we have Injected IFileProvider in the constructor to get the directories of our files and don’t forget to use the namespace Microsoft.Extensions.FileProviders.
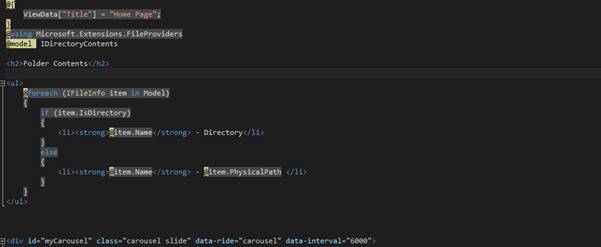
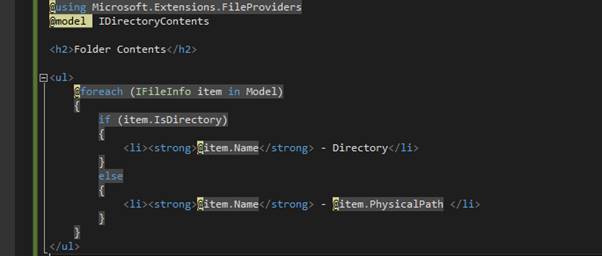
Now lets show the directories in the view. To do this we will write some Html code in the Index.cshtml file:
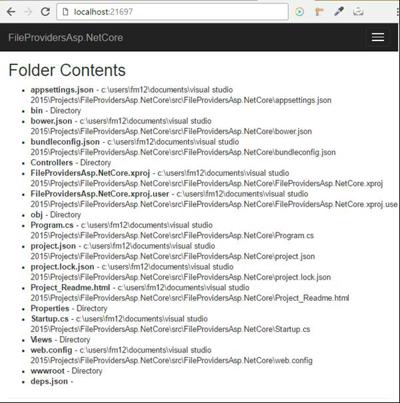
Now lets run the application and we will see the output as shown in the code snippet:
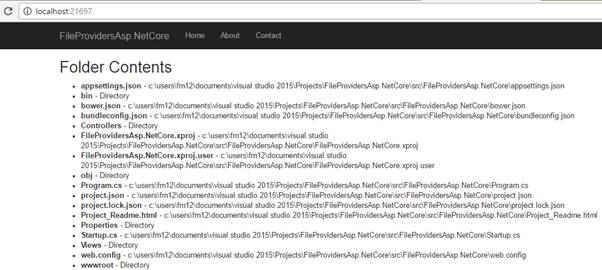
Thats our PhysicalFileProvider. Now lets look at:
2. EmbeddedFileProvider:
The files that are embedded in assemblies are accessed with the use of this FileProvider. Now Lets go to Startup.cs and add some code as shown in the code snippet below:

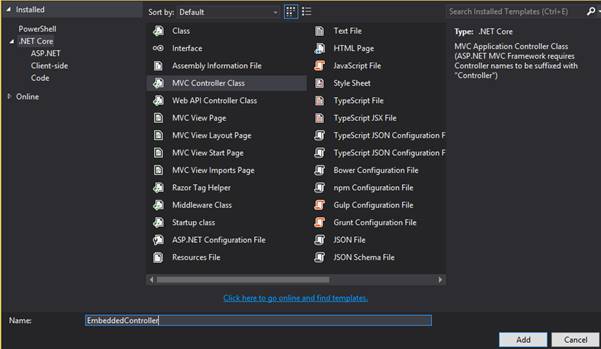
Add package Microsoft.Extensions.FileProviders.Embedded and also use namespace System.Reflection to avoid the error. Now lets create a controller and name it as ”EmbeddedController” .
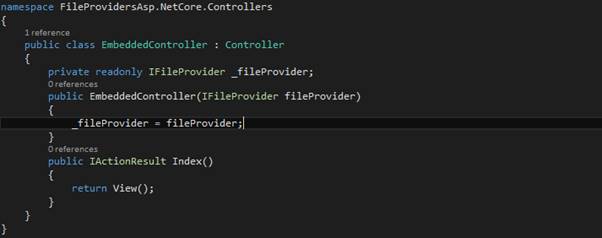
Now add some code in it as we did in HomeController for PhysicalFileProvider as shown in the figure below:
Now create a folder named “Embedded” in the Views folder and add a view page as shown in the code snippet below:
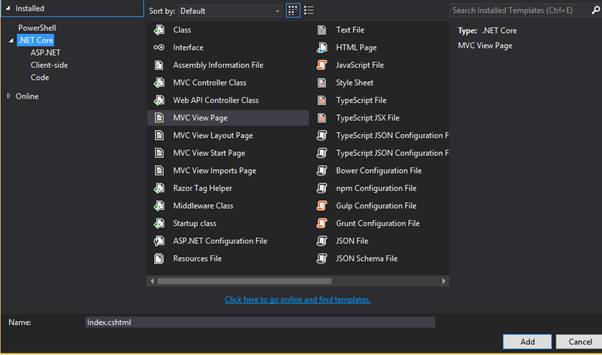
And write the same code as we did in the PhysicalFileProvider i.e in Index.chtml file in the HomeController.
Now build and run the application and the output will be as shown in the figure below:

3. CompositeFileProvider
As the name signifies CompositeFileProvider combines two or more IFileProvider instances. It also exposes a single interface for working with files.
In our project we will be creating a CompositeFileProvider and pass two IFileProvider instances physical and embedded providers to its constructor.
Now lets add some code in the startup.cs as shown in the figure below:

Now create a controller and view page and write the codes as we had done earlier.
After finishing , build the project and run the project and we’ll see both Physical and Embedded File Providers as shown in the figure below: