Deploying Asp.Net Core application with Docker - How to use Docker with ASP.NET Core
Docker is a most popular containerization tool today. Before we dive in details there are few small things that we need to understand like What is Docker, Container etc.
What is Docker?
Docker is a tool designed to make it easier to create, deploy, and run applications by using containers.
What is Container?
A container is a standard unit of software that packages up code and all its dependencies so the application runs quickly and reliably from one computing environment to another. A Docker container image is a lightweight, standalone, executable package of software that includes everything needed to run an application: code, runtime, system tools, system libraries and settings. For more genral info please visit docker web portal https://www.docker.com/
Why Docker is the best selection for .Net Core Application is If we have to host .Net Core application then things to do is
- Install .Net
- Install 3rd-party libraries
- Set up Web Server (IIS or NGINIX)
- Add environment variables
- Run Application
and any more things as per need, and if we have multiple servers then we have to do the same installation and configuration on every VM or machines not only these we have to maintain them as well so it's become a complex task.

With Docker the beauty is we just have to create the image, the Docker image contains everything that needed for a machine. To use them we just have to copy the image like container 1, container 2 and so on. The Docker Container image will have all the features of the actual container like an instance of a class. There are also base images where we can get some standard setup as well provided by the Microsoft team.
- Benefits of Docker is,
- Servers are standardized,
- Declarative server and application configurations,
- An image is equal to fundamental unit of deployment,
- Containers can be duplicated easily,
How to create a Docker image,
Creating a docker is simple just installing docker on our development machine, we can get docker from https://www.docker.com/get-started , we can find docker for all Windows, Linux and Mac.
So choose your docker download as per your machine, for example, if you on windows get the windows version of Docker.
After installing Docker, restart your machine and run PowerShell,
A command in PowerShell is
docker --version
will show you like
Docker version 18.09.o, build 4d60db4 or like that,

This confirms that you have Docker installed on your machine.
Once docker is running if you right click on docker icon on running tray, it will show you option and settings of docker, an image is shown below showing that docker is running as Linux but I want to make it for windows so I will click on switch to windows so that I can use for windows.
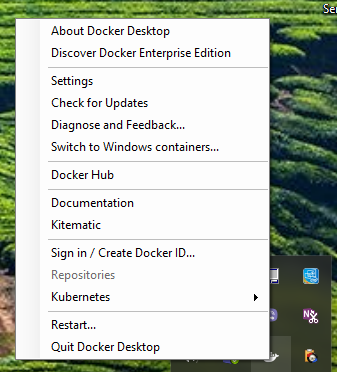
After clicking switch to windows there will be an option to switch to Linux which confirms that we are running docker for windows.
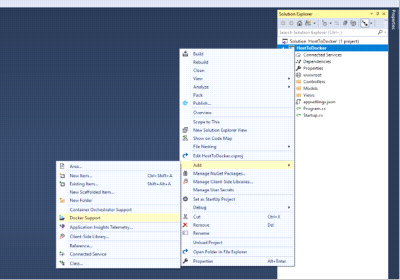
The next thing is we need docker file, the docker file will have all the details which tell the docker about configuration and image required, we can create docker file inside visual studio, just right click on solution file and choose add and then choose add docker support and if you creating new project then there is option to Enable Docker support both will bring the same option for you.
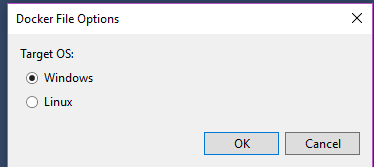
After adding Docker support it will bring an option for Target OS,
The options are,
Windows and Linux, choose as per your need.
For this example, I had selected windows, and the docker file will look like,
#Depending on the operating system of the host machines(s) that will build or run the containers, the image specified in the FROM statement may need to be changed.
#For more information, please see https://aka.ms/containercompat

FROM microsoft/dotnet:2.2-aspnetcore-runtime-nanoserver-1803 AS base
WORKDIR /app
EXPOSE 80

FROM microsoft/dotnet:2.2-sdk-nanoserver-1803 AS build
WORKDIR /src
COPY ["HostToDocker/HostToDocker.csproj", "HostToDocker/"]
RUN dotnet restore "HostToDocker/HostToDocker.csproj"
COPY . .
WORKDIR "/src/HostToDocker"
RUN dotnet build "HostToDocker.csproj" -c Release -o /app

FROM build AS publish
RUN dotnet publish "HostToDocker.csproj" -c Release -o /app

FROM base AS final
WORKDIR /app
COPY --from=publish /app .
ENTRYPOINT ["dotnet", "HostToDocker.dll"]

For clean and smaller one we can also have Dockerfile like,

From microsoft/dotnet:2.2-sdk As build
WORKDIR /src

COPY *.csproj .
RUN dotnet restore

COPY . .
RUN dotnet publish -c Release -o /app

FROM microsoft/dotnet:2.2-aspnetcore-runtime AS runtime
WORKDIR /app
COPY --from=build /app ./
ENV ASPNETCORE_URLS http://*:5000

ENTRYPOINT ["dotnet","HostToDocker.dll"]
Or we can write the docker file event in notepad and set exactly what we need too. But if you writing in notepad then make sure the Docker file is in the root directory with no extension.
Now our docker is running and we added support for docker now, its time to run our project from docker, as the image is shown below,
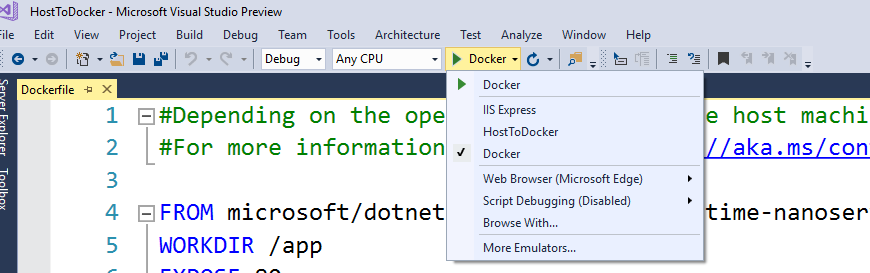
After pressing run it will add an image of dotnet:2.2-aspnetcore, dotnet:2.2-sdk-nanoserver-1803 and add restore, build in release mode, then publish, then copy all publish a file to Docker container as per our Docker file command. To Conform you have docker image use command with PowerShell
docker images
This will list all the images that you have running on your machine.
To run the image command is
docker run -it -p 5000:5000 imageName
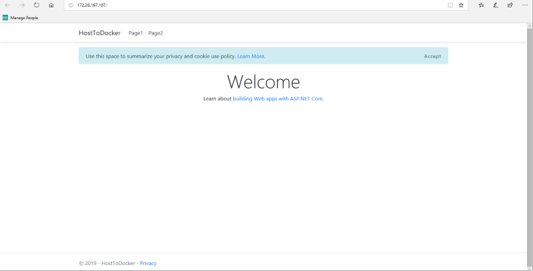
Then we have our default asp.net core application running on windows docker with nanoserver. A final running version output from docker is shown below,
And we can do the same thing with PowerShell as well, when we work with Docker it's good to use PowerShell to make things simple, so in order to do the same thing with PowerShell,
First navigate to the root folder of your project then,
a command is
docker build -t hostdockerproject .
Where "hostdockerproject" can be any name of your image and the "." is to indicate we want to build from root directory.
Once PowerShell command gets completed we will get results as we got from visual studio.
Note:- All runtime and sdk are of currently available version of today, so if please check your runtime version etc when working with your projects.
To monitor container and use there few more commands please try yourself. like
- docker run -d -p yourrunningport NameofImage - To run container in background
- docker ps - Check status etc we can also set output format also with this
- docker stop imageName - To sop running image
For Security point of view please Note,
- Only use containers from trusted parties or providers,
- If the code does not come from internal or a trusted third party, do not rely on the container,
Just by running Docker and containers security will not come all those stuff that we do for real production hosting for applications we have to do that with containers too.
All best with Docker and containerization, Start today, you going to Love it.