ASP.NET CORE - Blazor CRUD operation using ADO.NET
ASP.NET CORE - Blazor CRUD operation using ADO.NET
You can find this Demo on github
In this article, we are going to create a web application using Blazor with the help of ADO.NET. Here we are going to discuss about how to perform the Create, Read, Update and Delete also called CRUD operations in Blazor with ADO.NET.We will be creating a sample Customer Record Management System and perform CRUD using Blazor on it.

Prerequisites:
- Install the .NET Core 2.1 or above SDK
- Install Visual Studio 2017 v15.7 or above (Blazor framework is not supported by versions below Visual Studio 2017 v15.7.)
- SQL Server
For this article I will use:
- Visual studio 2019
- .Net core 3.0
- SQL SERVER 2016
Now lets get start by creating database for the demonstration;
Creating Table and Stored Procedures
We will be using a Database table for storing all the records of Customers. Open SQL Server and use the following script to create tblCustomer table.
Create table tblCustomer(

CustomerId int IDENTITY(1,1) NOT NULL,

Name varchar(20) NOT NULL,

City varchar(20) NOT NULL,

Country varchar(20) NOT NULL,

Gender varchar(6) NOT NULL

)
Now, we will create stored procedures to add, delete, update, and get Customer data.
Stored Procedure to insert a Customer Record
Create procedure usp_AddCustomer

(

    @Name VARCHAR(20),

    @City VARCHAR(20),

    @Country VARCHAR(20),

    @Gender VARCHAR(6)

)

as

Begin

    Insert into tblCustomer (Name,City,Country, Gender)

    Values (@Name,@City,@Country, @Gender)

End
Stored Procedure to view all Customer Records
Create procedure spGetAllCustomer

as

Begin

    select

                   CustomerId,

                   Name,

                   City,

                   Country,

                   Gender

    from tblCustomer

End
Stored Procedure to get a single Customer Records
Create procedure usp_GetCustomerByID
(
    @CustomerId int
)
as
Begin
    SELECT * FROM tblCustomer WHERE CustomerID= @CustomerId
End
Stored Procedure to update a Customer Record
Create procedure usp_UpdateCustomer

(

   @CustomerId INTEGER ,

   @Name VARCHAR(20),

   @City VARCHAR(20),

   @Country VARCHAR(20),

   @Gender VARCHAR(6)

)

as

begin

   Update tblCustomer

   set Name=@Name,

   City=@City,

   Country=@Country,

   Gender=@Gender

   where CustomerId=@CustomerId

End
Stored Procedure to delete a Customer Record
Create procedure usp_DeleteCustomer

(

   @CustomerId int

)

as

begin

   Delete from tblCustomer where CustomerId=@CustomerId

End
Here, we complete our Database part.
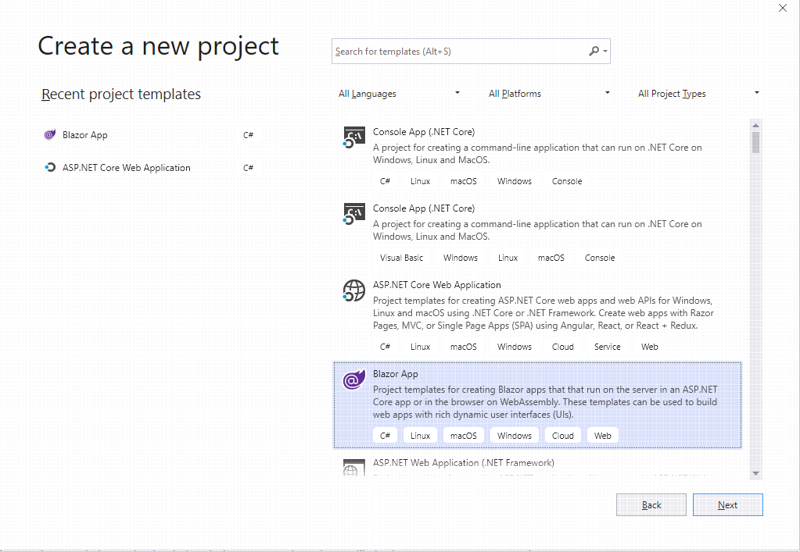
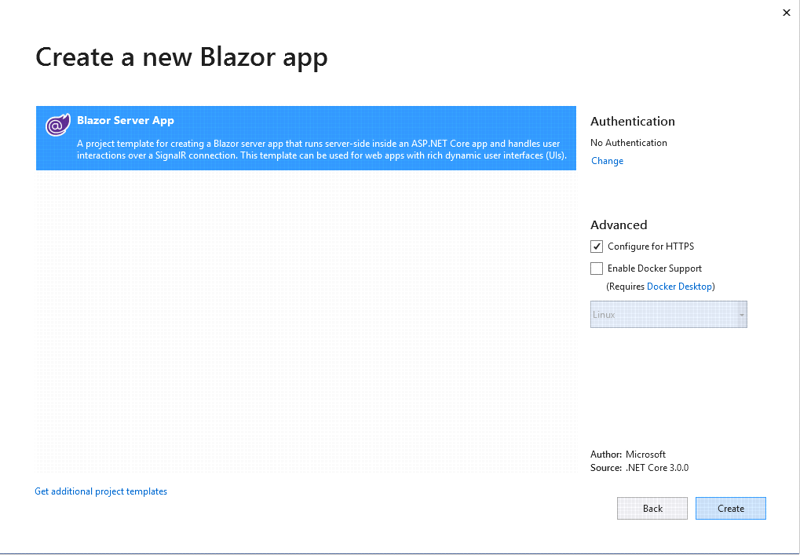
Now let's then proceed by creating our .Net core Blazor application using visual studio.
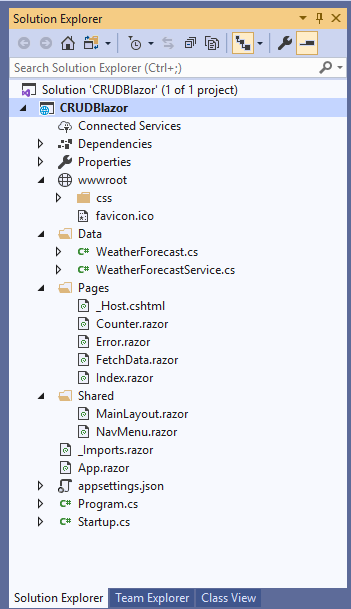
Our newly created project look like this;
Execute the program, it will open the browser and you will see a page similar to the one shown below.
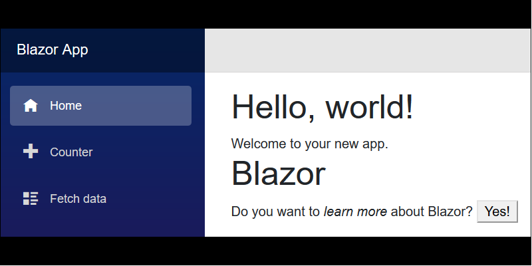
In above picture we can see navigation menu on the left side, which contains the navigation to the pages in our application. By default, we have “Counter” and “Fetch Data” pages provided in our application. These default pages won't affect our application so we left these as it is.
Adding the Model to the Application
Now,
- Right-click Data folder and select Add >> Class.
- Name your class Customer.cs.
- This class will contain our Customer model properties.
- similarly, Add one more class file to Models folder.
- Name it as CustomerDataAccessLayer.cs and CustomerService.cs.
- CustomerDataAccessLayer class will contain our Database related operations and CustomerService contain logic related code.
- Now, the Data folder look like this

Add following code in Customer.cs.
using System.ComponentModel.DataAnnotations;
namespace CRUDBlazor.Data
{
    public class CustomerInfo
    {
        public int CustomerId { get; set; }
        [Required]
        public string Name { get; set; }
        [Required]
        public string City { get; set; }
        [Required]
        public string Country { get; set; }
        [Required]
        public string Gender { get; set; }
    }
}
put the following code to handle database operations on CustomerDataAccessLayer.cs. Make sure to put your connection string.
using System;
using System.Collections.Generic;
using System.Data;
using System.Data.SqlClient;
using System.Linq;
using System.Threading.Tasks;

namespace CRUDBlazor.Data
{
    public class CustomerDataAccessLayer
    {
        // string connectionString = "Put Your Connection string here";
        string connectionString = "Data Source=192.168.1.67,5810;Initial Catalog=Customers;Integrated Security=True";
        //To View all Customers details
        public IEnumerable<CustomerInfo> GetAllCustomers()
        {
            List<CustomerInfo> lstCustomer = new List<CustomerInfo>();
            using (SqlConnection con = new SqlConnection(connectionString))
            {
                SqlCommand cmd = new SqlCommand("usp_GetAllCustomers", con);
                cmd.CommandType = CommandType.StoredProcedure;
                con.Open();
                SqlDataReader rdr = cmd.ExecuteReader();
                while (rdr.Read())
                {
                    CustomerInfo Customer = new CustomerInfo();
                    Customer.CustomerId = Convert.ToInt32(rdr["CustomerID"]);
                    Customer.Name = rdr["Name"].ToString();
                    Customer.Gender = rdr["Gender"].ToString();
                    Customer.Country = rdr["Country"].ToString();
                    Customer.City = rdr["City"].ToString();
                    lstCustomer.Add(Customer);
                }
                con.Close();
            }
            return lstCustomer;
        }
        //To Add new Customer record
        public void AddCustomer(CustomerInfo Customer)
        {
            using (SqlConnection con = new SqlConnection(connectionString))
            {
                SqlCommand cmd = new SqlCommand("usp_AddCustomer", con);
                cmd.CommandType = CommandType.StoredProcedure;
                cmd.Parameters.AddWithValue("@Name", Customer.Name);
                cmd.Parameters.AddWithValue("@Gender", Customer.Gender);
                cmd.Parameters.AddWithValue("@Country", Customer.Country);
                cmd.Parameters.AddWithValue("@City", Customer.City);

                con.Open();
                cmd.ExecuteNonQuery();
                con.Close();
            }
        }
        //To Update the records of a particluar Customer
        public void UpdateCustomer(CustomerInfo Customer)
        {
            using (SqlConnection con = new SqlConnection(connectionString))
            {
                SqlCommand cmd = new SqlCommand("usp_UpdateCustomer", con);
                cmd.CommandType = CommandType.StoredProcedure;

                cmd.Parameters.AddWithValue("@CustomerId", Customer.CustomerId);
                cmd.Parameters.AddWithValue("@Name", Customer.Name);
                cmd.Parameters.AddWithValue("@Gender", Customer.Gender);
                cmd.Parameters.AddWithValue("@Country", Customer.Country);
                cmd.Parameters.AddWithValue("@City", Customer.City);
                con.Open();
                cmd.ExecuteNonQuery();
                con.Close();
            }
        }
        //Get the details of a particular Customer
        public CustomerInfo GetCustomerData(int? id)
        {
            CustomerInfo Customer = new CustomerInfo();

            using (SqlConnection con = new SqlConnection(connectionString))
            {

                SqlCommand cmd = new SqlCommand("usp_GetCustomerByID", con);
                cmd.CommandType = CommandType.StoredProcedure;

                cmd.Parameters.AddWithValue("@CustomerId", id);
                con.Open();
                SqlDataReader rdr = cmd.ExecuteReader();

                while (rdr.Read())
                {
                    Customer.CustomerId = Convert.ToInt32(rdr["CustomerID"]);
                    Customer.Name = rdr["Name"].ToString();
                    Customer.Gender = rdr["Gender"].ToString();
                    Customer.Country = rdr["Country"].ToString();
                    Customer.City = rdr["City"].ToString();
                }
            }
            return Customer;
        }
        //To Delete the record on a particular Customer
        public void DeleteCustomer(int? id)
        {
            using (SqlConnection con = new SqlConnection(connectionString))
            {
                SqlCommand cmd = new SqlCommand("usp_DeleteCustomer", con);
                cmd.CommandType = CommandType.StoredProcedure;
                cmd.Parameters.AddWithValue("@CustomerId", id);
                con.Open();
                cmd.ExecuteNonQuery();
                con.Close();
            }
        }
    }
}
The newly created service name (i. e. CustomerService.cs) should be register in the ConfigureServices method in the <applicationName>\Startup.cs file.
Startup.cs
 public void ConfigureServices(IServiceCollection services)
        {
            services.AddRazorPages();
            services.AddServerSideBlazor();
            services.AddSingleton<WeatherForecastService>();
            services.AddSingleton<CustomerService>();
        }
Note: If you miss this step you may get following error:
There is no registered service of type error in blazor.net when adding a new service
Now, Let us put our codes in pages and controller to perform the CRUD operation. create a page called "AddCustomer.razor"
@page "/addCustomer"
@using CRUDBlazor.Data
@inject CustomerService ObjCustomService
@inject NavigationManager NavigationManager
<h2>Create Customer</h2>
<hr />
<form>
    <div class="row">
        <div class="col-md-8">
            <div class="form-group">
                <label for="Name" class="control-label">Name</label>
                <input for="Name" class="form-control" @bind="@objCI.Name" />
            </div>
            <div class="form-group">
                <label asp-for="Gender" class="control-label"></label>
                <select @bind="@objCI.Gender" class="form-control">
                    <option value="">-- Select Gender --</option>
                    <option value="Male">Male</option>
                    <option value="Female">Female</option>
                </select>
            </div>
            <div class="form-group">
                <label for="Country" class="control-label">Country</label>
                <input for="Country" class="form-control" @bind="@objCI.Country" />
            </div>
            <div class="form-group">
                <label for="City" class="control-label">City</label>
                <input for="City" class="form-control" @bind="@objCI.City" />
            </div>
        </div>
    </div>
    <div class="row">
        <div class="col-md-4">
            <div class="form-group">
                <input type="button" class="btn btn-primary" @onclick="@CreateCustomer" value="Save" />
                <input type="button" class="btn btn-primary" @onclick="@Cancel" value="Cancel" />
            </div>
        </div>
    </div>
</form>

@code {
    CustomerInfo objCI = new CustomerInfo();
    protected void CreateCustomer()
    {
        ObjCustomService.Create(objCI);
        NavigationManager.NavigateTo("Customer");
    }
    void Cancel()
    {
        NavigationManager.NavigateTo("Customer");
    }
}
Let us add some business logic to our CustomerService.cs and create an object of CustomerDataAccessLayer class inside the CustomerService class in order to handle the database operations.
 public string Create(CustomerInfo objCustomer)
        {
            objCustomerDAL.AddCustomer(objCustomer);
            return "Added Successfully";
        }
This view is for displaying all the Customer records present in the database. Also, all the operation; Edit and Delete on each record can be done form this view.
Add following code on Customer.razor
@page "/Customer"
@using CRUDBlazor.Data
@inject CustomerService ObjCustomService

<NavLink class="nav-link" href="AddCustomer">
    <span class="oi oi-plus" aria-hidden="true"></span> Add New
</NavLink>

<h1>Customer Data</h1>
@if (objCtmr == null)
{
    <p><em>Loading...</em></p>
}
else
{
    <table class="table">
        <thead>
            <tr>
                <th>Customer ID</th>
                <th>Name</th>
                <th>Gender</th>
                <th>Country</th>
                <th>City</th>
                <th>Action</th>
            </tr>
        </thead>
        <tbody>
            @foreach (var temp in objCtmr)
            {
                <tr>
                    <td>@temp.CustomerId</td>
                    <td>@temp.Name</td>
                    <td>@temp.Gender</td>
                    <td>@temp.Country</td>
                    <td>@temp.City</td>
                    <td>
                        <a class="nav-link" href="EditCustomer/@temp.CustomerId">
                            <span class="oi oi-pencil" aria-hidden="true"></span> Edit
                        </a>
                        <a class="nav-link" href="DeleteCustomer/@temp.CustomerId">
                            <span class="oi oi-trash" aria-hidden="true"></span> Delete
                        </a>
                    </td>
                </tr>
            }
        </tbody>
    </table>
}
@code {
    List<CustomerInfo> objCtmr;
    protected override async Task OnInitializedAsync()
    {
        CustomerService objCS = new CustomerService();
        objCtmr = await Task.Run(()=> objCS.GetCustomer());
    }
}
Add following code on CustomerService.cs
public List<CustomerInfo> GetCustomer()
        {
            List<CustomerInfo> customers = objCustomerDAL.GetAllCustomers().ToList();
            return customers;
        }
Edit: EditCustomer.razor
This view will enable us to edit an existing Customer data.
@page "/EditCustomer/{CurretnID}"
@using CRUDBlazor.Data
@using System;
@inject CustomerService ObjCustomService
@inject NavigationManager NavigationManager
<h2>Create Customer</h2>
<hr />
<form>
    <div class="row">
        <div class="col-md-8">
            <div class="form-group">
                <input for="Name" class="form-control" @bind="@objCI.CustomerId" />
            </div>
            <div class="form-group">
                <label for="Name" class="control-label">Name</label>
                <input for="Name" class="form-control" @bind="@objCI.Name" />
            </div>
            <div class="form-group">
                <label asp-for="Gender" class="control-label"></label>
                <select @bind="@objCI.Gender" class="form-control">
                    <option value="">-- Select Gender --</option>
                    <option value="Male">Male</option>
                    <option value="Female">Female</option>
                </select>
            </div>
            <div class="form-group">
                <label for="Country" class="control-label">Country</label>
                <input for="Country" class="form-control" @bind="@objCI.Country" />
            </div>
            <div class="form-group">
                <label for="City" class="control-label">City</label>
                <input for="City" class="form-control" @bind="@objCI.City" />
            </div>
        </div>
    </div>
    <div class="row">
        <div class="col-md-4">
            <div class="form-group">
                <input type="button" @onclick="@UpdateCustomer" class="btn btn-primary" value="Save" />
                <input type="button" @onclick="@Cancel" class="btn btn-primary" value="Cancel" />
            </div>
        </div>
    </div>
</form>
@code {
    [Parameter]
    public string CurretnID { get; set; }
    CustomerInfo objCI = new CustomerInfo();

    protected override async Task OnInitializedAsync()
    {
        objCI =await Task.Run(()=> ObjCustomService.GetCustomerByID(Convert.ToInt32(CurretnID)));
    }
    protected void UpdateCustomer()
    {
        ObjCustomService.UpdateCustomer(objCI);
        NavigationManager.NavigateTo("Customer");
    }
    void Cancel()
    {
        NavigationManager.NavigateTo("Customer");
    }
}
To handle the logic of Edit Customer by GetCustomerByID and UpdateCustomer, add following method on CustomerService.cs.
public CustomerInfo GetCustomerByID(int id)
        {
            CustomerInfo customer = objCustomerDAL.GetCustomerData(id);
            return customer;
        }
 public string UpdateCustomer(CustomerInfo objcustomer)
        {
            objCustomerDAL.UpdateCustomer(objcustomer);
            return "Update Successfully";
        }
Delete Customer:
This view will help us remove Custoemr data. Open DeleteCustomer.razor and put following code into it.
@page "/DeleteCustomer/{CurretnID}"
@using CRUDBlazor.Data
@using System;
@inject CustomerService ObjCustomService
@inject NavigationManager NavigationManager
<h2>Delete Customer</h2>
<hr />
<h3>Are you sure you want to delete this?</h3>
<div class="row">
    <div class="col-md-8">
        <div class="form-group">
            <label>Customer ID:</label>
            <label>@objCI.CustomerId</label>
        </div>
        <div class="form-group">
            <label>Name:</label>
            <label>@objCI.Name</label>
        </div>
        <div class="form-group">
            <label>Gender:</label>
            <label>@objCI.Gender</label>
        </div>
        <div class="form-group">
            <label>Country:</label>
            <label>@objCI.Country</label>
        </div>
        <div class="form-group">
            <label>City:</label>
            <label>@objCI.City</label>
        </div>
    </div>
</div>
<div class="row">
    <div class="col-md-4">
        <div class="form-group">
            <input type="button" @onclick="@DeleteCustomers" class="btn btn-primary" value="Delete" />
            <input type="button" @onclick="@Cancel" class="btn btn-primary" value="Cancel" />
        </div>
    </div>
</div>

@code {
    [Parameter]
    public string CurretnID { get; set; }
    CustomerInfo objCI = new CustomerInfo();

    protected override async Task OnInitializedAsync()
    {
        objCI = ObjCustomService.GetCustomerByID(Convert.ToInt32(CurretnID));
    }
    protected void DeleteCustomers()
    {
        ObjCustomService.DeleteCustomer(objCI);
        NavigationManager.NavigateTo("Customer");
    }
    void Cancel()
    {
        NavigationManager.NavigateTo("Customer");
    }
}
To handle the business logic of Delete, open CustomerService.cs and add following code to it.
public string DeleteCustomer(CustomerInfo objcustomer)
        {
            objCustomerDAL.DeleteCustomer(objcustomer.CustomerId);
            return "Delete Successfully";
        }
Note: Before running your Web application, you must put your Database connection string on CustomerDataAccessLayer class.
For example
 string connectionString = "Put Your Connection string here";
//string connectionString = "Data Source=192.168.1.67,5810;Initial Catalog=Customers;Integrated Security=True";
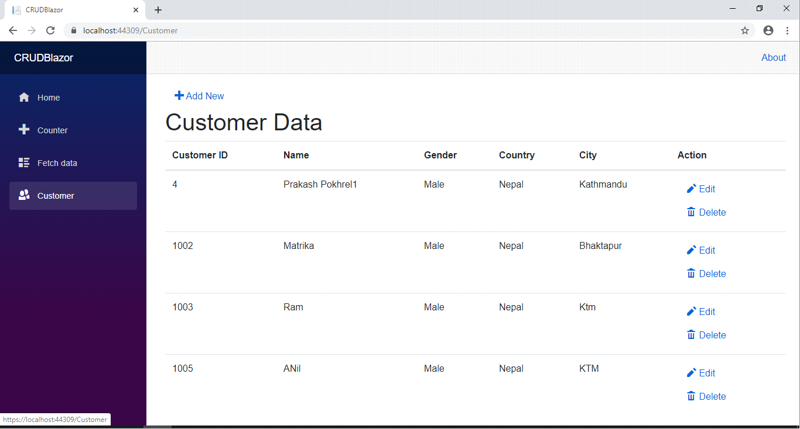
Output:
Let us check our output by running a project. Here we can see our output.
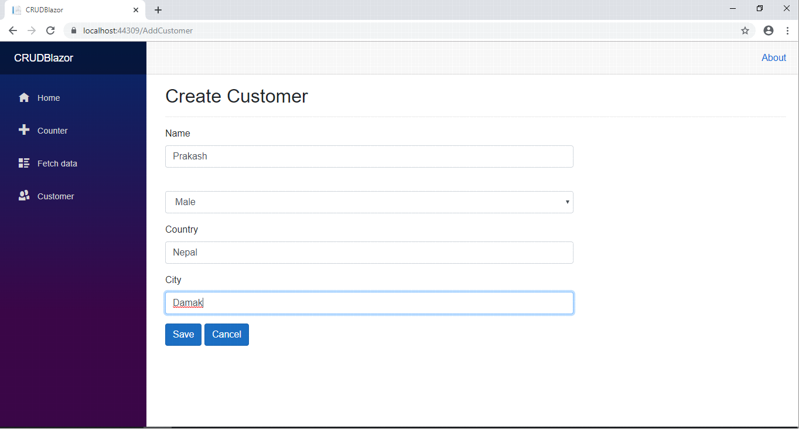
click on Add New
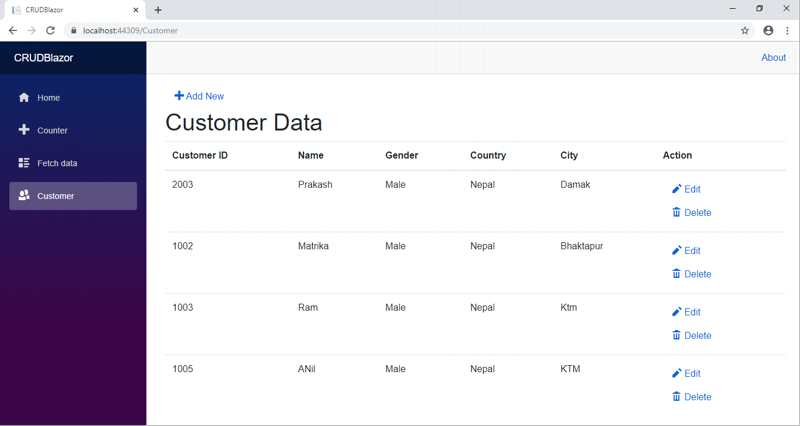
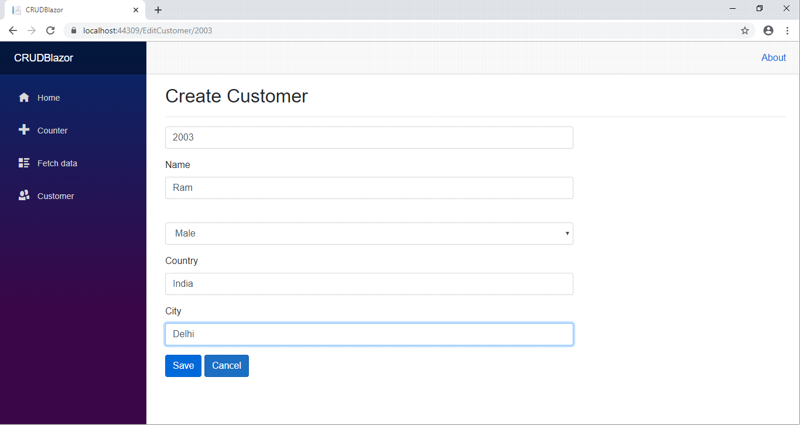
Similarly we can perform edit operation

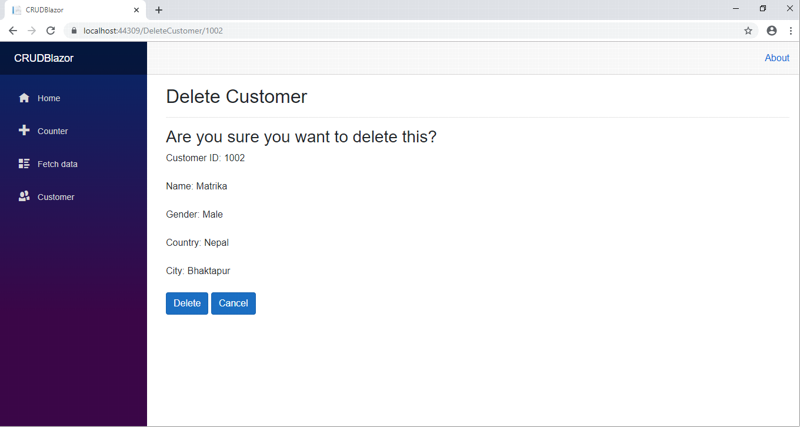
Now, we can perform Delete operation on a Customer named Matrika. Click Delete action link which will open Delete view asking for a confirmation to delete.
Once we click Delete, it will request to delete Customer record and we will be redirected to the Customer page. Here, we can see that the Customer with name Matrika has been removed from our record.

Conclusion
We have learned about creating a sample CRUD operation with Blazor ASP.Net Core 3.0 web application using ADO.NET and SQL server with the help of Visual Studio 2019. We have used stored procedures to handle CRUD operations at the database level.