Creating a Login Session in ASP .NET Core
What is Session?
A Session starts when a user logs into a website and ends when the user logs out of any site in the internet. Session temporarily stores the user information with a unique ID while the user is connected.
Session is a ASP. NET feature for storage of user data while the user browse through the website. A session cookie is used by website to store user information which is retrieved the next time user logs in to the system. But, on the other hand session variables are only used to store temporary variables.
No matter what type of website you are creating, if there is login and authentication then, there will definitely be use of sessions. So, it also plays a important role in the security of the website.
When not to use Session?
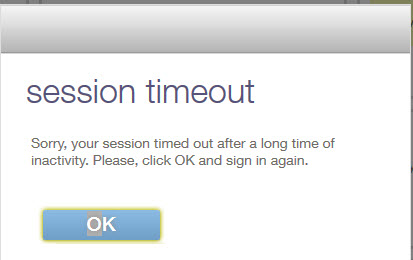
Session should not be used when storing a large amount of data as session data is stored in the memory so, it could slow down the performance of the system.
How do we create a Log In session in .NET core:
Below we have provided the steps required on how to create a Log in session. There can be different methods for creating a Session according to different requirements and purpose.But, below we have described the basic steps on creating a Log in session which could be helpful for anyone finding it difficult to create one for themself.
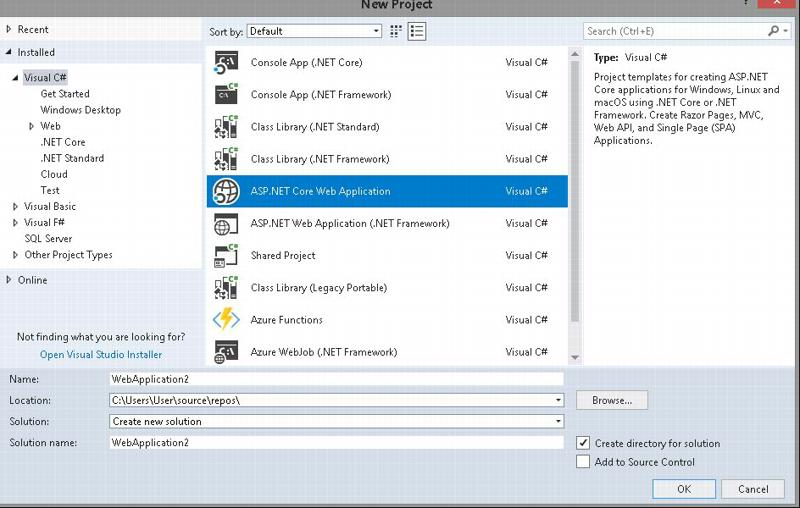
First create a new ASP .NET core Web Application project in .NET
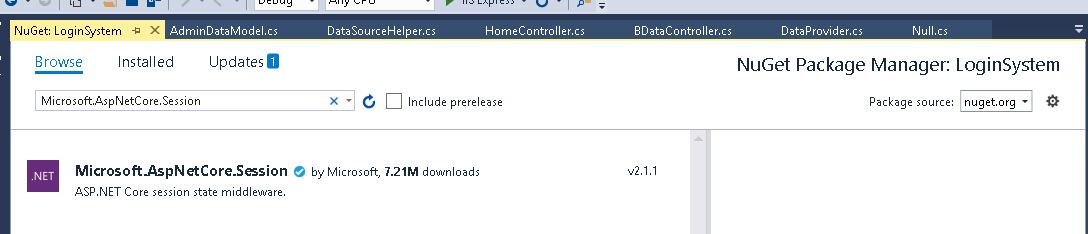
Add the Session Package from Nuget for .NET core:
Open Startup class go to Configure function and addapp.UseSession() as below
public void Configure(IApplicationBuilder app, IHostingEnvironment env)
{
if (env.IsDevelopment())
{
app.UseDeveloperExceptionPage();
app.UseBrowserLink();
}
else
{
app.UseExceptionHandler("/Home/Error");
}

app.UseStaticFiles();

app.UseSession();

app.UseMvc(routes =>
{
routes.MapRoute(
name: "default",
template: "{controller=Home}/{action=Index}/{id?}");
});
Configure Service method in Startup add sevices.AddSession() with some configuration as:
The IdleTimeout sets the timeout for the session after a certain time of inactivity
public void ConfigureServices(IServiceCollection services)
{

services.AddDistributedMemoryCache();

services.AddSession(options => {
options.IdleTimeout = TimeSpan.FromMinutes(1);//You can set Time
});

services.AddMvc();
}
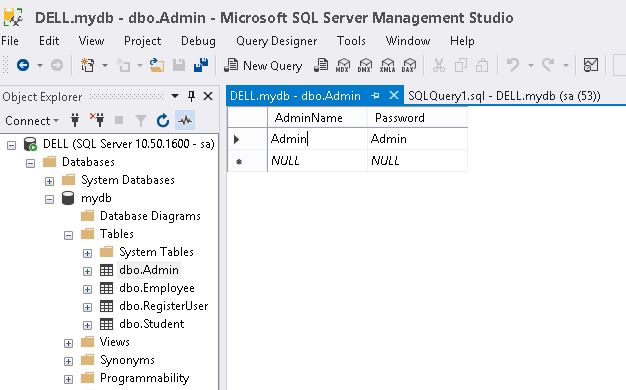
Create a new database in your Microsoft SQL Server and create a table with UserName and Password
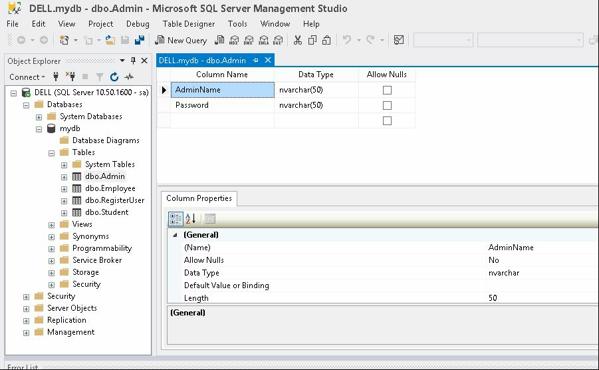
Insert random UserName and Password to your table by going to the table which will be used for Logging in to the website
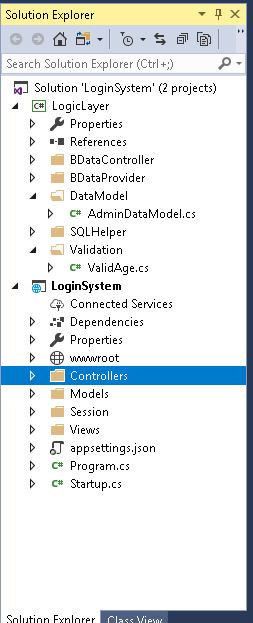
We have created project named LoginSystem which contains a Class Library called Logic Layer.
We have made the website two tier so that it can be mode more secure and all the task is performed by Logic Layer.But, you can also do it through single project. The logic layer creates connection with database and all the manipulation to database is done through LogicLayer. The SQL Helper folder in LogicLayer contains is a file which is a helper class used for database connection and SQL manipulation. You can also create your own connection procedure.
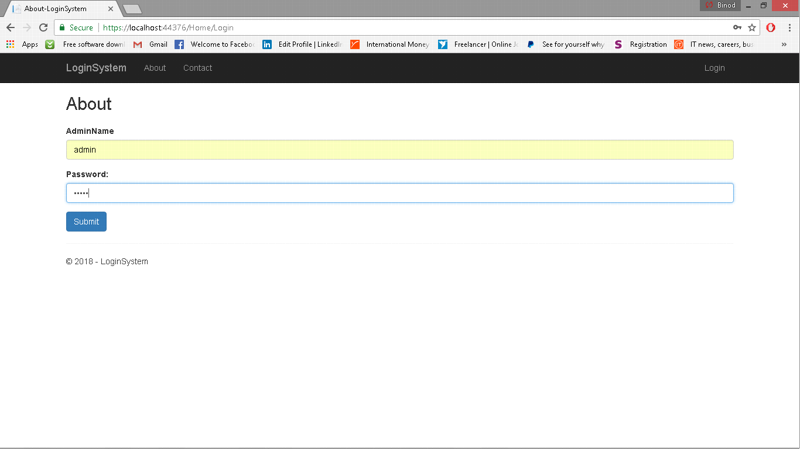
We have created a login view page in Views which contains the login form as given below:
@model LogicLayer.DataModel.AdminDataModel
@{
    ViewData["Title"] = "About";
}
<h2>@ViewData["Title"]</h2>
<h3>@ViewData["Message"]</h3>

<form method="post">

    <div class="form-group">
        <label>AdminName</label>
        <input type="text" class="form-control" asp-for="AdminName" />
        <span asp-validation-for="AdminName"></span>
    </div>

    <div class="form-group">
        <label>Password:</label>
        <input type="password" class="form-control" asp-for="Password" />
        <span asp-validation-for="Password"></span>
    </div>
    <input class="btn btn-primary" type="submit" />
</form>
We have created a Login action in controller with get and post method which looks like this:
Controller Action:Login
In above controller action :Login we can see the checkLogin() function , which checks whether the Admin name and password provided by the user matches the record in our table in database.For this we have used stored procedure. The defination for check login function is provided below:
 internal AdminDataModel checkLogin(AdminDataModel emp)
        {

            List<KeyValuePair<string, object>> Paramater = new List<KeyValuePair<string, object>>();

            Paramater.Add(new KeyValuePair<string, object>("@AdminName", emp.AdminName));

            Paramater.Add(new KeyValuePair<string, object>("@AdminPassword", emp.Password));


            AdminDataModel adminobj = new AdminDataModel();
            SQLHandler SQLH = new SQLHandler();

            adminobj =SQLH.ExecuteAsObject<AdminDataModel>("checkAdmin", Paramater);

             return adminobj;
        }
Here the SQL procedure checkAdmin is executed which returns the record if the admin name matches the record from database else it returns null.
If the login value is valid it redirects to the next action named Contact which contains the registration page with its respective View and Session.
  [HttpGet]
        public IActionResult Contact()
        {

            var UserInfo = GetUserSession();
            if(UserInfo == null)
            {
              return  RedirectToAction("Login", "Home");
            }
            ViewBag.UserInfo = UserInfo;
            FormModel fm = new FormModel();
            return View(fm);
        }


        [HttpPost]
        public IActionResult Contact(FormModel fm)
        {

            HttpContext.Session.Clear();

            if (ModelState.IsValid)
            {
                BDataController bcontroller = new BDataController();
                FormModel objform = new FormModel();

                objform = bcontroller.checkEmail(fm);
                if (objform == null)
                {
                    string message = "";
                    bcontroller.saveData(fm);
                    message = "The record Created Successfully";
                    return Content(message);
                }
                else
                {
                    ModelState.AddModelError("Email", "The Email already exists");
                    return View(fm);
                }
            }

                return View(fm);

        }
We have used SetUserSession() and GetUserSession() as the function for instantiating the session. The function is just used for making the Get and Set session process easier and shorter.The defination for the function is provided in BaseContoller class which is inherited by the HomeContoller.
The definition is given below:
namespace LoginSystem.Controllers
{
    public class BaseController:Controller
    {
        public AdminDataModel GetUserSession()
        {
           var userInfo= HttpContext.Session.GetObjectFromJson<AdminDataModel>("UserInfo");
            return userInfo;
        }
        public void SetUserSession(AdminDataModel ObjadminDataModel)
        {
            HttpContext.Session.SetObjectAsJson("UserInfo", ObjadminDataModel);
        }
        public void DeleteSession()
        {
            HttpContext.Session.Remove("UserInfo");
        }
    }
}
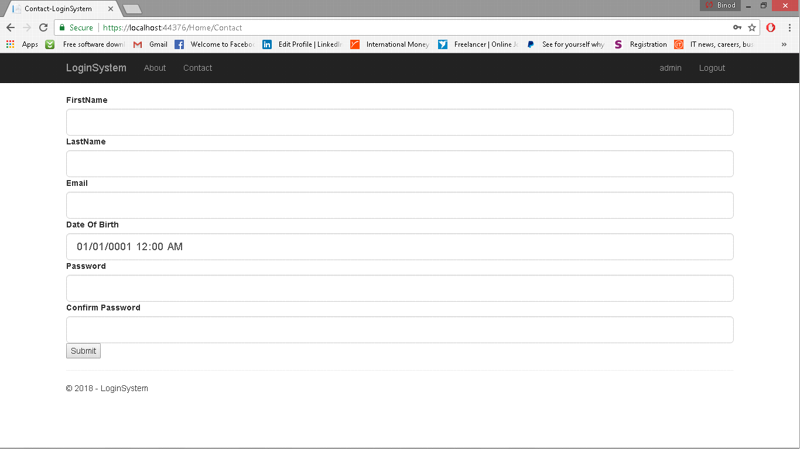
The respective View for the Controller action: Contact is given below:
@model LogicLayer.DataModel.FormModel
@{
    ViewData["Title"] = "Contact";
}

<h2>@ViewBag.AdminName</h2>
<h2>@ViewBag.AdminName</h2>


<form action="/Home/Contact" method="post">

    <div class="form-group-lg">
        <label asp-for="FirstName">FirstName</label>
        <input class="form-control" id="FirstName" type="text" asp-for="FirstName" />
        <span asp-validation-for="FirstName" id="FirstName" name="FirstName" class="text-danger"></span>
    </div>

    <div class="form-group-lg">
        <label asp-for="LastName">LastName</label>
        <input class="form-control" type="text" asp-for="LastName" />
        <span asp-validation-for="LastName" class="text-danger"></span>
    </div>


    <div class="form-group-lg">
        <label asp-for="Email">Email</label>
        <input class="form-control" type="text" asp-for="Email" />
        <span asp-validation-for="Email"></span>

    </div>

    <div class="form-group-lg">
        <label asp-for="DOB">Date Of Birth</label>
        <input class="form-control" asp-for="DOB" />
        <span asp-for="DOB"></span>

    </div>

    <div class="form-group-lg">
        <label asp-for="UserPassword">Password</label>
        <input type="password" class="form-control" asp-for="UserPassword" />
        <span asp-for="UserPassword"></span>
    </div>

    <div class="form-group-lg">
        <label asp-for="ConfirmPassword"> Confirm Password</label><br />
        <input type="password" asp-for="ConfirmPassword" class="form-control" />
        <span asp-validation-for="ConfirmPassword"></span>
   </div>

   <input type="submit" />

</form>
The model for our project contains two classes named AdminDataModel and Form Model class with required model validation which looks like this:
public class AdminDataModel
    {

        [Required(ErrorMessage = "The name field is required")]
        [Display]
        public string AdminName { get; set; }

        [Required(ErrorMessage = "The password field is required")]
        public string Password { get; set; }

    }

    public class FormModel
    {
        [Required(ErrorMessage = "The FirstName is required")]
        public string FirstName { get; set; }

        [Required(ErrorMessage = "The LastName is required")]
        public string LastName { get; set; }

        [Required(ErrorMessage = "The Email field is required")]
        [RegularExpression(@"^([a-zA-Z0-9_\-\.]+)@((\[[0-9]{1,3}" +
                           @"\.[0-9]{1,3}\.[0-9]{1,3}\.)|(([a-zA-Z0-9\-]+\" +
                           @".)+))([a-zA-Z]{2,4}|[0-9]{1,3})(\]?)$",
                           ErrorMessage = "Email is not valid")]
        public string Email { get; set; }

        [Required(ErrorMessage = "The DOB is required")]
        [DataType(DataType.DateTime)]
        [ValidAge]
        public DateTime DOB { get; set; }

        [Required(ErrorMessage = "Please enter the password")]
        public string UserPassword { get; set; }

        [Required(ErrorMessage = "please confirm the password")]
        [MinLength(5,ErrorMessage ="Password is too short")]
        [Compare("UserPassword",ErrorMessage ="The passwords do not match retype")]
        public string ConfirmPassword { get; set; }

    }
}
Now when the login matches the admin name and password from database it redirects to the next page and the session stores the AdminName and Password as an object.For storing the object in the Session we convert the object into JSON and store it into HttpContext Session and retrieve from it in a same way. For that we have created a class called Session which is provided below:
namespace LoginSystem.Session
{
    public static class SessionExtensions
    {
        public static void SetObjectAsJson(this ISession session, string key, object value)
        {
            session.SetString(key, JsonConvert.SerializeObject(value));
        }

        public static T GetObjectFromJson<T>(this ISession session, string key)
        {
            var value = session.GetString(key);

            return value == null ? default(T) : JsonConvert.DeserializeObject<T>(value);
        }
    }
}
We have also Modified the layout page in Shared where we have added if-else condition such that it
Displays logout button and the session value to the top right corner and user cannot go to the login page when the Session value is not null until the user logs out
Displays login button to the top right corner and the user cannot access registration page until the user signs in.
FileName: _Layout.cshtml
<body>
    <nav class="navbar navbar-inverse navbar-fixed-top">
        <div class="container">
            <div class="navbar-header">
                <button type="button" class="navbar-toggle" data-toggle="collapse" data-target=".navbar-collapse">
                    <span class="sr-only">Toggle navigation</span>
                    <span class="icon-bar"></span>
                    <span class="icon-bar"></span>
                    <span class="icon-bar"></span>
                </button>
                <a asp-area="" asp-controller="Home" asp-action="Index" class="navbar-brand">LoginSystem</a>
            </div>
            <div class="navbar-collapse collapse">
                <ul class="nav navbar-nav">

                    <li><a asp-area="" asp-controller="Home" asp-action="Index">About</a></li>
                    <li><a asp-area="" asp-controller="Home" asp-action="Contact">Contact</a></li>
                </ul>
                @if (@ViewBag.UserInfo != null)
                {
                    <ul class="nav navbar-nav pull-right">
                        <li><a href="#">@ViewBag.UserInfo.AdminName</a></li>
                        <li><a asp-area="" asp-controller="Home" asp-action="Logout">Logout</a></li>
                    </ul>
                }
                else
                {
                    <ul class="nav navbar-nav pull-right">
                        <li><a asp-area="" asp-controller="Home" asp-action="Login">Login</a></li>
                    </ul>
                }

            </div>
        </div>
    </nav>
When the user is logged in and the session value is not null it displays the admin name and logout link at the top right corner of the page and after the user logs out the page is redirected to log in page.
Output:
When the user clicks login from the home page:
After the validation of user and after the submission button is clicked the page is redirected to another page with Registration form and the session is started.
It contains the admin name at the top right corner.
Here the session is created with AdminName and the user cannot go to the login page until the Session is cleared. After the session is cleared user is redired to login page.
We are sharing this article in a hope it will be useful to anyone who is building a login system. It can also be a reference for people who are begineers in .NET Core.
Also See: Best Laptops for a programmer in 2019
If you want to learn about the SQL Handler that I have implemented in my project then visit the link below:
Read : How to use ADO.NET in .NET Core 2.x for Performance Critical Applications