How to install IIS on Windows 10?
Steps to Install IIS on Windows 10:
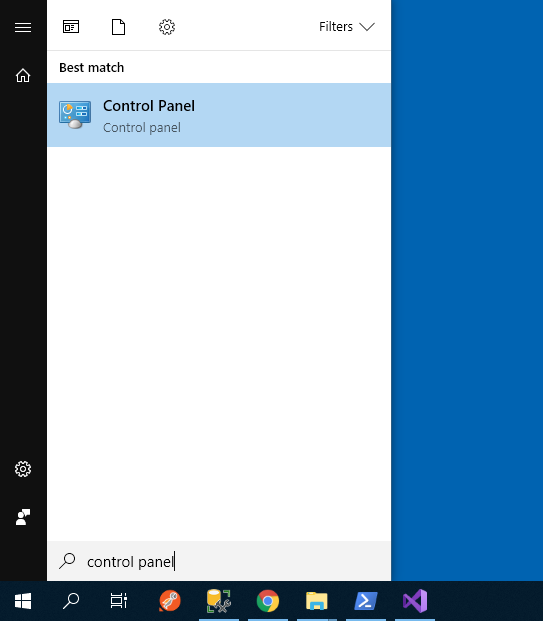
Step 1: Go to the window search bar in Type Control Panel, as shown in the image below.
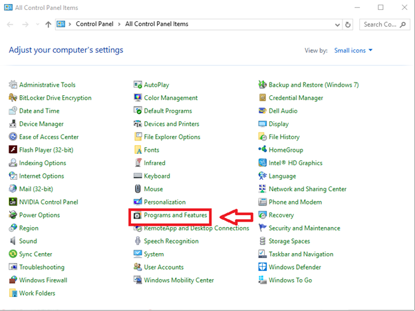
Step 2: Under ‘programs and features” option, click on it.
Step 3: Now On the left-hand side you’ll find “Turn Windows feature on or off” option, just click on it

Step 4: Here, you will find various features. Just Check “Internet Information Services” radio button to activate it.
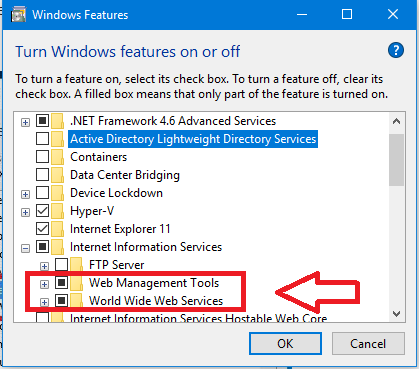
Step 5: Now click on ‘+’ sign beside the “Internet Information Services” to configure the additional features.
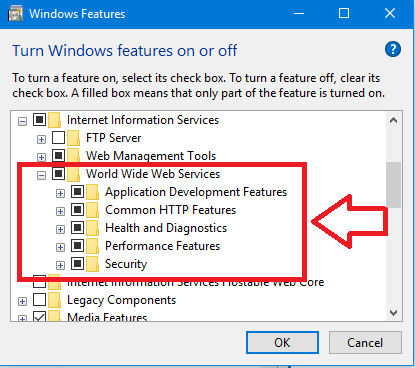
Step 6: I have selected “Web Management Tools” and “World Wide Web Services”.
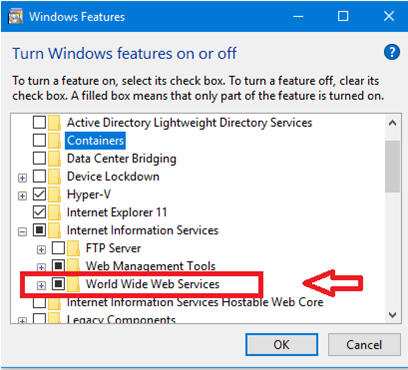
Step 7: Now, to be more specific go to World Wide Web Services, click on “+” in order to expand it. This service is used to keep the web server secure.
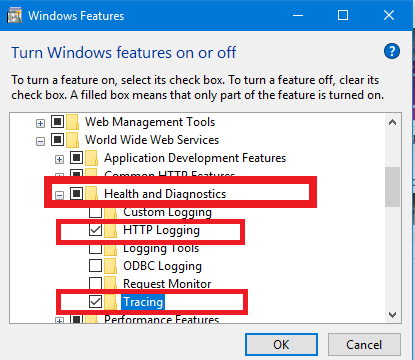
Step 8: Then move to “Health and Diagnostics” under that check “Http Logging” and “tracing” as shown in the figure below. Basically, Tracing is used to trace the web requests easily.
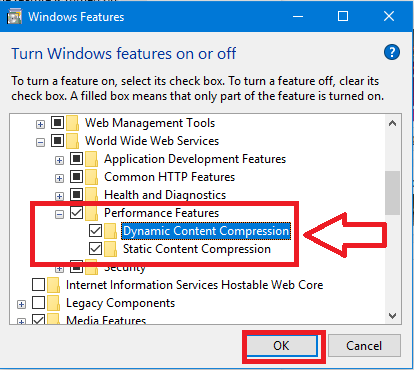
Step 9: You can also select “Performance features” by exploring it. You may see two options, one is for the static, and another one is for the dynamic content compression. This defines the type of web pages you create, i.e., static web page or dynamic web page.
I have chosen both “Static Content Compression” and “Dynamic Content Compression”
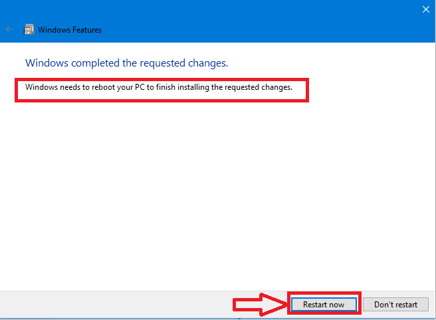
Once the changes have been made, click on “OK” to install IIS.
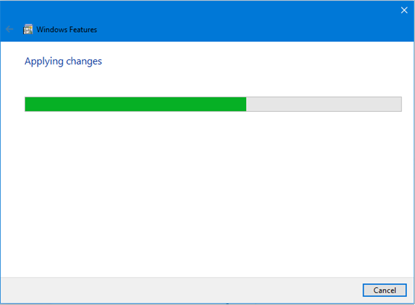
Step 10: It will take some time to install. Wait for a while, once the changes are applied, Click on “Close” button.
To ensure that IIS is installed on your system. You may open any browser which you want and then in the address bar of that browser, just type” http://localhost” You will see a web page as shown below.
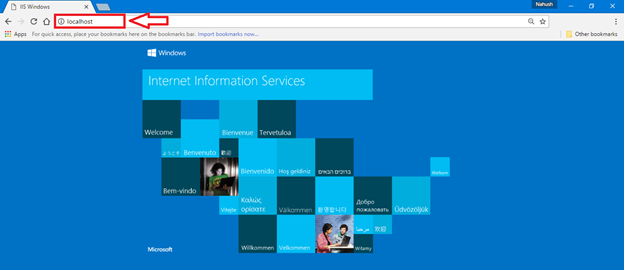
Your Installation is now complete, and you are ready to enjoy the world of internet.